Bluetooth Scanner
This week I investigated a lot into the Bluetooth areas, which was quite fun and challenging. The challenging part was to design as clearly and user-friendly as possible in such a small display. I imagined a lot of ways to make the display contain as rich info as it could and here's what I achieved. I tried hard and feel almost satisfied for what I did. Code is hosted on Github.

How I made this
SO the whole thing can be divided into five parts:
- Discover all the listed Bluetooth devices
- Fill info of the listed devices into a JSON array.
- display the list on the screen
- Make the chosen line scroll horizontally
- Make the "up" and "down" button
The most challenging part for me during the whole process was to the fourth step -- to find a way to scroll the info horizontally till the right text bounds. Till now I still cannot fix the problem after checking all the source code. I'll leave the question for Tom's office hour.
Step 1. Discover Bluetooth devices
In Arduino -> example ->Arduino BLE -> Central -> Scan.ino / Peripheral Explorer.ino / ScanCallBack.ino, all the scripts have shown how to disover Bluetooth devices mainly using BLE.scan(). And you can get peripheral info including name, address, localname, UUID, etc. I just randomly choose address, RSSI and local name if applicable as my listed info.
In example Peripheral Explorer.ino, it showed how to connect to a specific device. It could be my next step in my hardware Bluetooth scanner.
Step 2. Fill info to the JSON
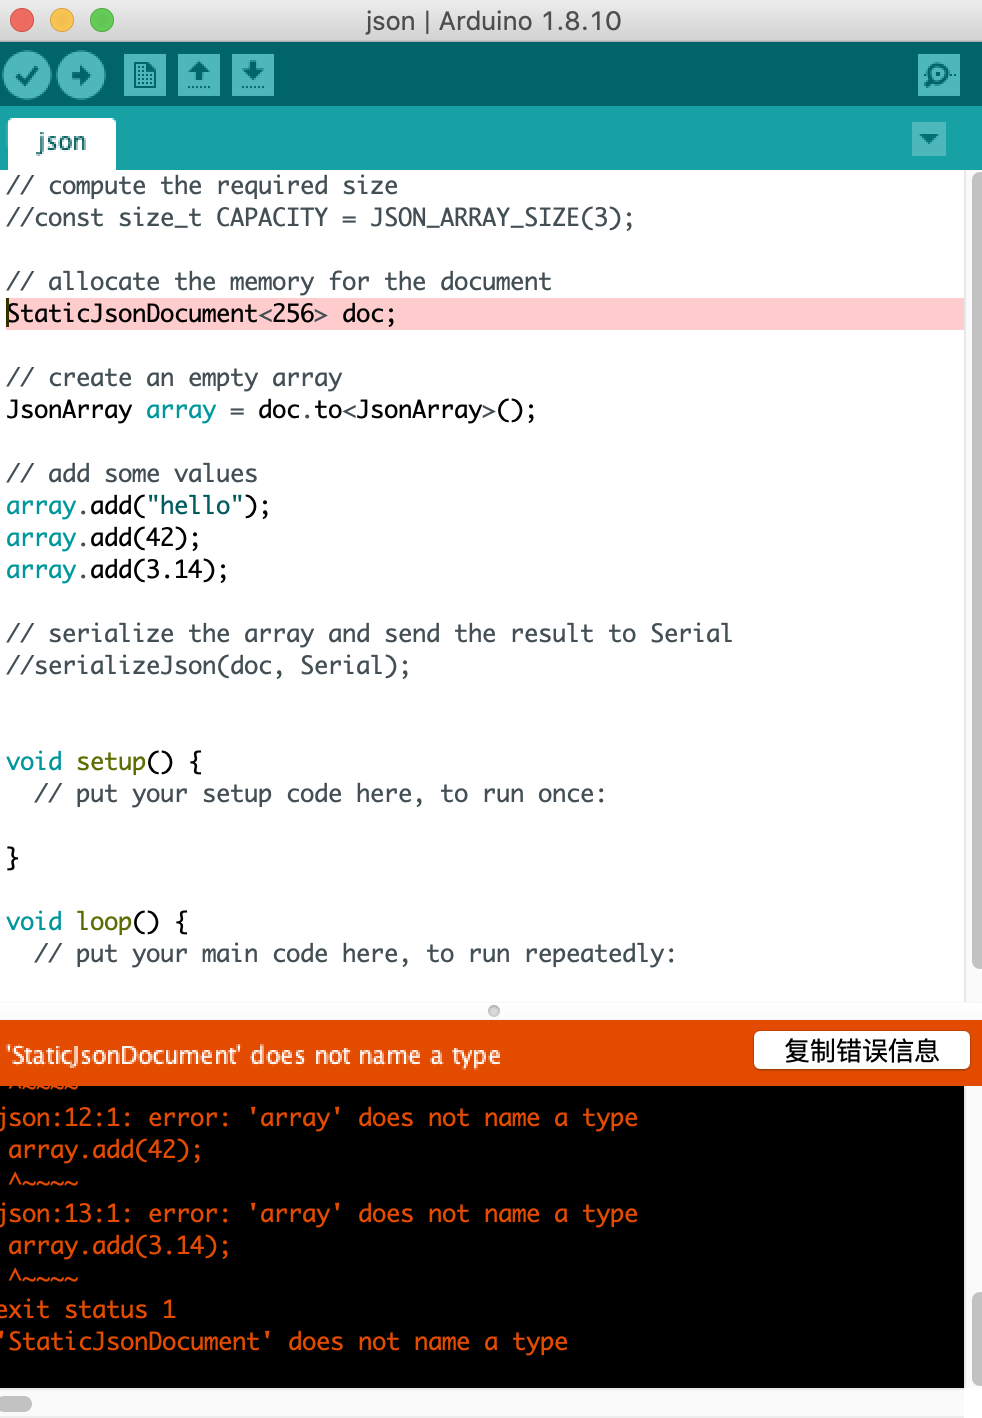
I had to admit that it surprised me how much time on this part -- which was about an hour actually. At first, I though I need to use JSON array or JSON object to store the info, so that I could naturally use functions like json.clear(), json.add(). So I looked into this documents https://arduinojson.org/v6/api/jsonarray/. The error I encountered was the initialization failure. The error was like this:

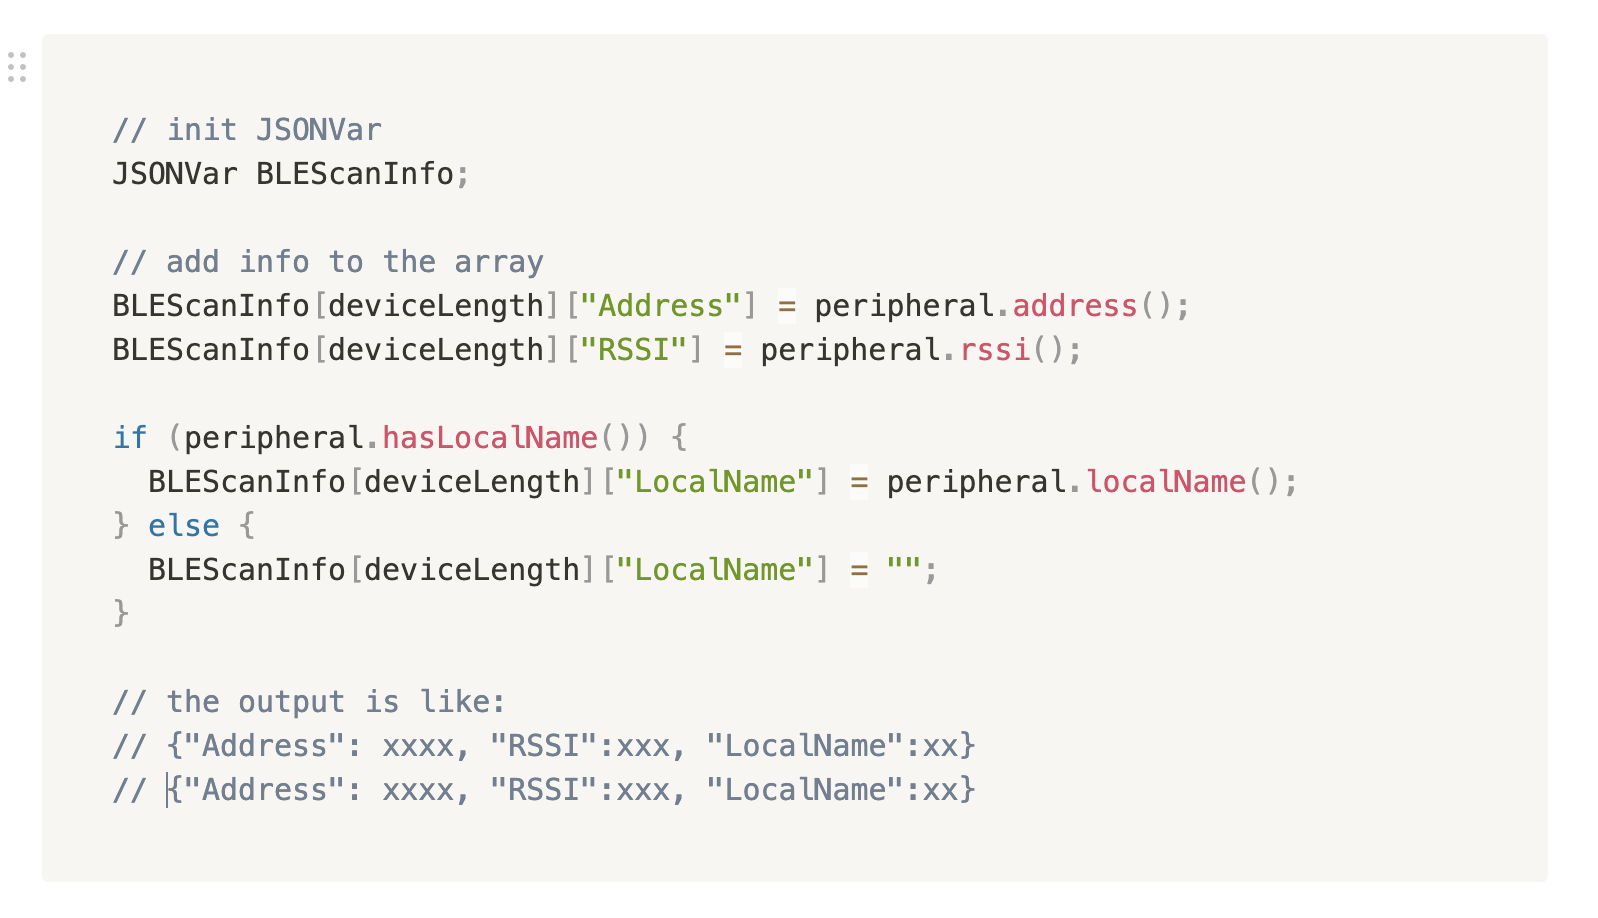
I tried dynamicJSON and still got the same error. Finally I passed this problem and happily discovered that JSONVar accepted object arrays.
So I the core JSON of my listed devices look like this.

Step 3. Display the list
It was fairly easy since we've done last week's assignment. I'll just skip this part.
Step 4. Scroll the screen
To stop the text wrap, you need to put this line in the setup function:
display.setTextWrap(false);
At first I tried function display.startscrollright(0x00, 0x07). It actually scrolled the full screen to right and wouldn't show the texts outside of screen, which didn't fulfill my requirements. You can check this post for the detailed explanation of this function about how it worked and how to modify this.
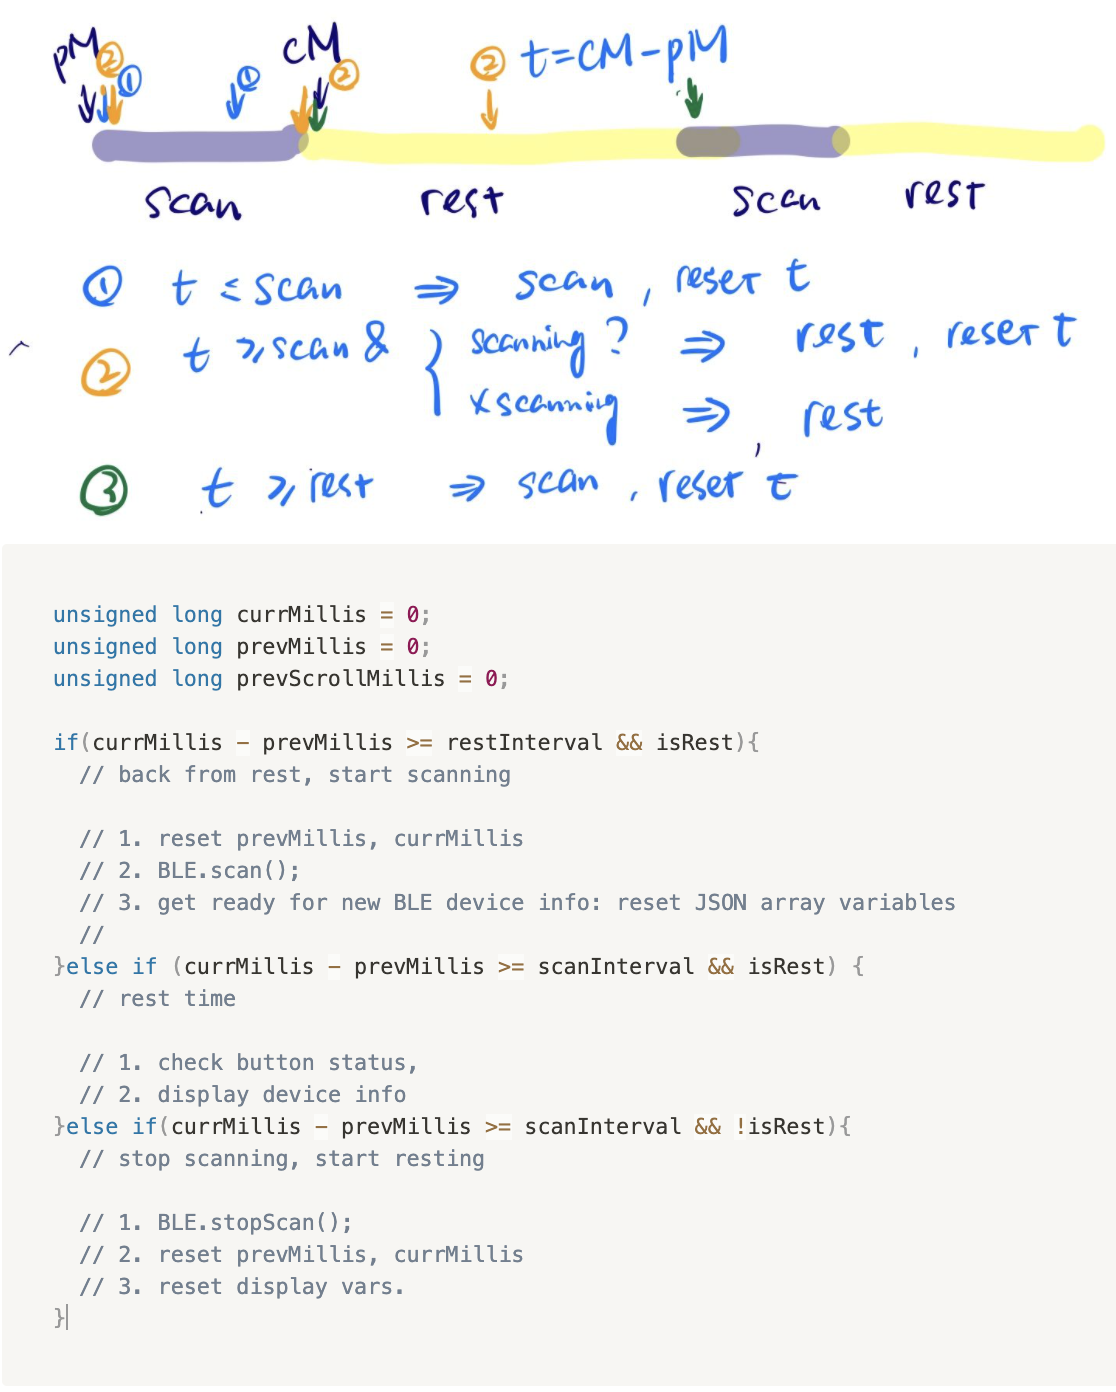
So I decided to scroll the text by manually moving the cursor to the negative x direction. It worked pretty well. But it had to delay for a few milliseconds so that you have enough time to see the info. Delay() was absolutely not acceptable in my case, since I need button to interrupt scrolling, which meant I need to add a variable for the millis() judgement.
If you want to play with the scrolling, check this separate Arduino code that only demonstrated the horizontal scrolling effect using delay().
Step 5. Add buttons
I made a relatively clear structure to analyze what to do in which period. So just add the button checkpoint in the resting period and it's done.

